3.6 KiB
RTL C-lightning setup
- Introduction
- Pre-requisite
- Architecture
- Installation
- Prep for execution
- Start the server and access the app
Introduction
RTL is now enabled to manage lightning nodes running C-Lightning.
Follow the below steps to install and setup RTL to run on C-Lightning.
Pre-requisites:
- Functioning C-Lightning node. Follow install instructions on their github
- NodeJS - Can be downloaded here
- Cl-REST - Ensure that
cl-restAPI server is installed and running. Install instructions here - Copy the
access.macaroonfile fromcl-restto the device, on which RTL will be installed
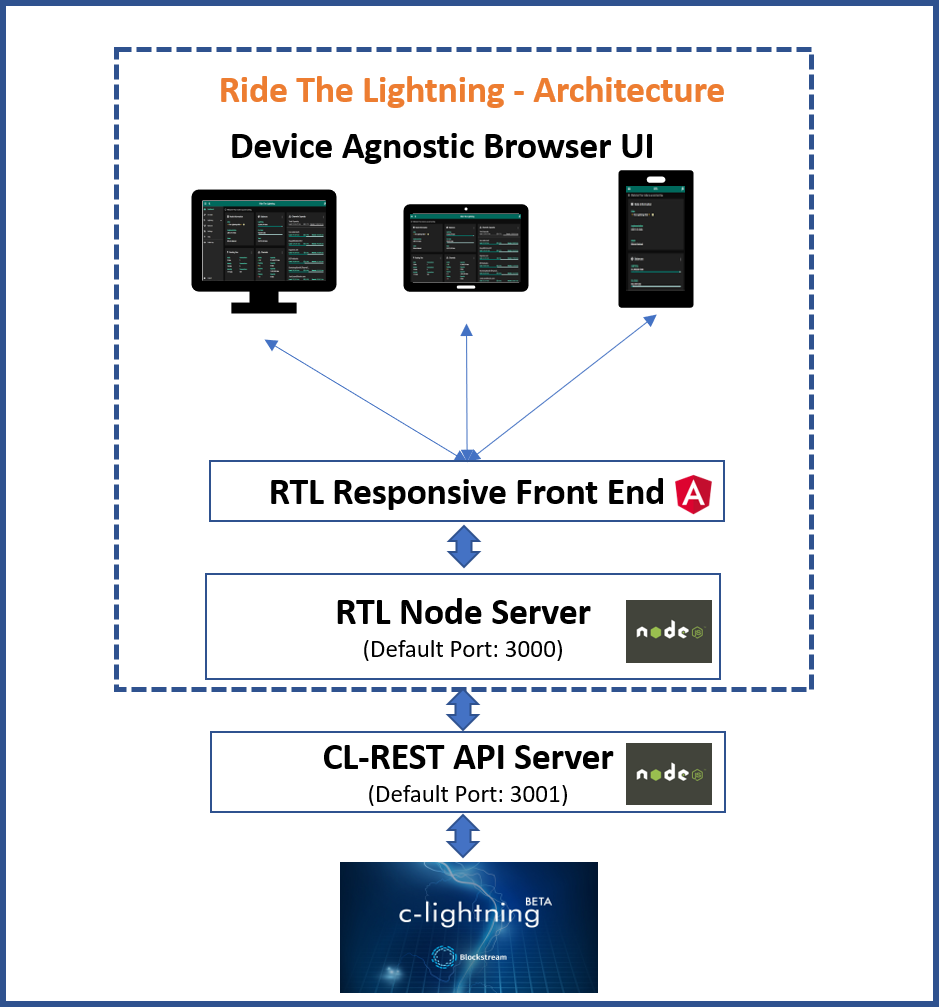
Architecture
Installation:
To download a specific RTL version follow the instructions on the release page
To download from master (not recommended):
First time setup
$ git clone https://github.com/Ride-The-Lightning/RTL.git
$ cd RTL
$ npm install --only=prod
Or: Update existing build
$ cd RTL
$ git reset --hard HEAD
$ git clean -f -d
$ git pull
$ npm install --only=prod
Prep for Execution
RTL requires its own config file RTL-Config.json, to start the server and provide user authentication on the app.
- Copy the file
Sample-RTL-Config.jsonfrom./RTL/docsto./RTLand rename it toRTL-Config.json. - Locate the complete path of the readable
access.macaroonfromcl-reston your node. - Modify the RTL conf file per the example file below
Ensure that the follow values are correct per your config:
lnImplementation- This should beCLT, indicating that RTL is connecting to a c-lightning node.macaroonPath- Path of the folder containingaccess.macaroonfile from cl-rest server.lnServerUrl- complete url with ip address and port of the cl-rest server.multiPass- Specify the password (in plain text) to access RTL. This password will be hashed and not stored as plain text.configPath(optional) - File path of the c-lightning config file, if RTL server is local to the c-lightning server.
{
  "port": "3000",
  "SSO": {
    "rtlSSO": 0,
    "rtlCookiePath": "",
    "logoutRedirectLink": ""
  },
  "nodes": [
    {
      "index": 1,
      "lnNode": "c-lightning Testnet # 1",
      "lnImplementation": "CLT",
      "Authentication": {
        "macaroonPath": "<Modify to include the path of the folder with access.macaroon>",
        "configPath": "<Optional - Config file path for c-lightning>"
      },
      "Settings": {
        "userPersona": "OPERATOR",
        "themeMode": "DAY",
        "themeColor": "PURPLE",
        "bitcoindConfigPath": "",
        "logLevel": "INFO",
        "fiatConversion": false,
        "lnServerUrl": "https://<cl-rest api server ip address>:3001"
      }
    }
  ],
  "multiPass": <password required for accessing RTL>
}
Start the server and access the app
Run the following command:
$ node rtl
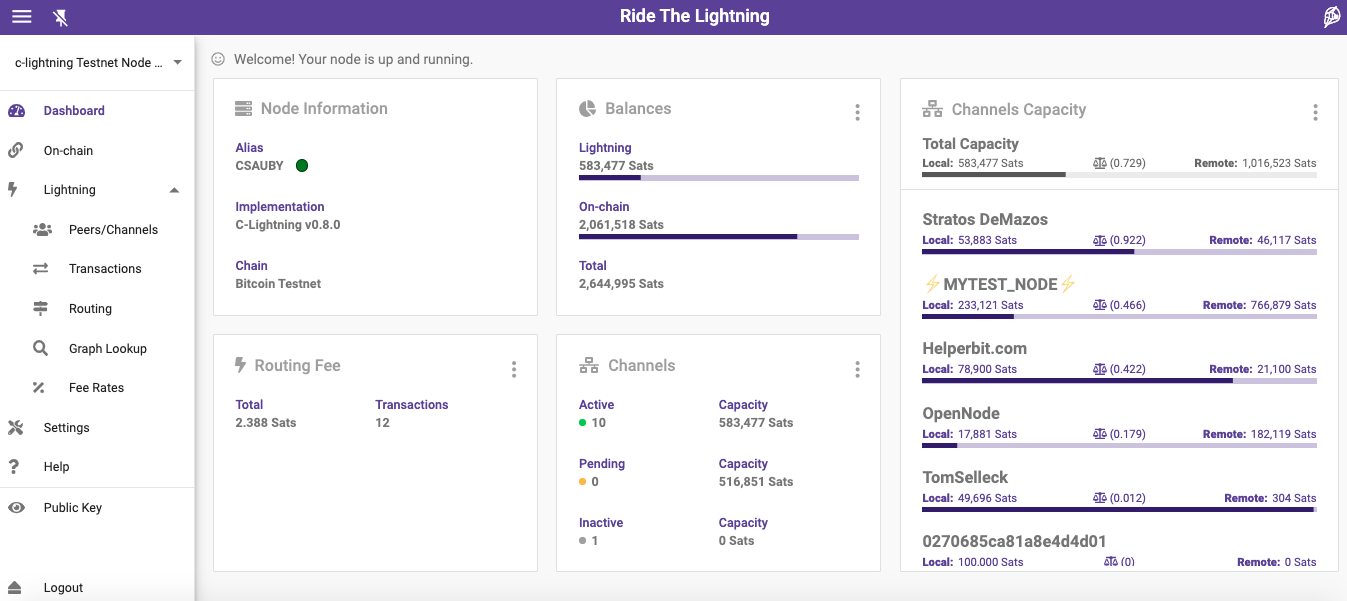
If the server started successfully, you should get the below output on the console:
$ Server is up and running, please open the UI at http://localhost:3000
Open your browser at the following address: http://localhost:3000 to access the RTL app.
Detailed config and instructions
For detailed config and access options and other information, view the main readme page.