You cannot select more than 25 topics Topics must start with a letter or number, can include dashes ('-') and can be up to 35 characters long.
faceit_live3/README.md

173 lines
6.0 KiB
Markdown

4 years ago
# faceit_live3
This is an update to http://github.com/faceit_live using [first order model](https://github.com/AliaksandrSiarohin/first-order-model) by Aliaksandr Siarohin to generate the images. This model only requires a single image, so no training is needed and things are much easier. I've included instructions on how to set it up under **Windows 10** and **Linux**.
4 years ago
# Demo
Here is a video of the program running. It uses a single page I took from partner's Facebook page!
[![Faceit Live3 Demo](https://raw.githubusercontent.com/alew3/faceit_live3/master/docs/demo.png)](https://www.youtube.com/watch?v=NDJ72v1uKpw)
4 years ago
# Setup
## Requirements
This has only been tested on **Ubuntu 18.04 and Win 10 with a Titan RTX/X GPU**.
4 years ago
You will need the following to make it work:
Linux host OS / Win 10
4 years ago
NVidia fast GPU (GTX 1080, GTX 1080i, Titan, etc ...)
Fast Desktop CPU (Quad Core or more)
4 years ago
Webcam
Anaconda Environment (https://www.anaconda.com/distribution/)
4 years ago
# Clone this repository
Don't forget to use the *--recurse-submodules* parameter to checkout all dependencies. In Windows you might need to install a [Git Client](https://git-scm.com/download/win).
$ git clone --recurse-submodules https://github.com/alew3/faceit_live3.git
## Download 'vox-adv-cpk.pth.tar' to /model folder
You can find it at: [google-drive](https://drive.google.com/open?id=1PyQJmkdCsAkOYwUyaj_l-l0as-iLDgeH) or [yandex-disk](https://yadi.sk/d/lEw8uRm140L_eQ).
# Install Nvidia Deep Learning Drivers / Libs
Install the latest Nvidia video driver then the Deep Learning infrastructure:
* NVidia [CUDA 10.1 driver](https://developer.nvidia.com/cuda-downloads) - 2.6GB Download!
* [cuDNN](https://developer.nvidia.com/cudnn) version for CUDA 10.1 - you will need to register to download it.
Other versions might work, but I haven't tested them.
## Usage
Put in the `/media` directory the images in jpg/png you want to play with. Squared images that have just a face filling most of the space will work better.
# Setup Windows Version
## Create an Anaconda environment and install requirements
```
$ conda create -n faceit_live3 python=3.8
$ conda activate faceit_live3
$ conda install pytorch=1.4 torchvision=0.5 cudatoolkit=10.1 -c pytorch
$ pip install -r requirements.txt
```
## Setup Virtual Camera for streaming
Download [OBS Studio for Win](https://obsproject.com/download) and install it, afterwards install the [OBS Virtual CAM plugin](https://github.com/CatxFish/obs-virtual-cam/releases) by following instructions on the page.
After you install Virtual CAM.
- Create a Scene
- Add a Window Capture item to Sources and select the "Stream Window"
- Add a Filter to the Window Capture by right clicking and selecting Filters, then "+" and choose Virtual CAM
- Start the Virtual CAM from the Tools Menu
[![Select the OBSCAM](https://raw.githubusercontent.com/alew3/faceit_live3/master/docsobs.png)]
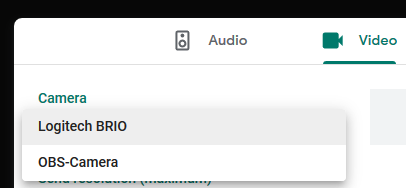
Open Firefox and joing Google Hangout to test it, don't forget to choose the OBS CAM from the camera options under settings.
[![Select the OBSCAM](https://raw.githubusercontent.com/alew3/faceit_live3/master/docs/obscam.png)]
# Setup Linux Version
## Create an Anaconda environment and install requirements
```
$ conda create -n faceit_live3 python=3.8
$ source activate faceit_live3
$ conda install pytorch=1.4 torchvision=0.5 cudatoolkit=10.1 -c pytorch
$ pip install -r requirements.txt
```
4 years ago
To use the fake webcam feature to enter conferences with our stream we need to insert the **v4l2loopback** kernel module in order to create */dev/video1*. Follow the install instructions at (https://github.com/umlaeute/v4l2loopback), then let's setup our fake webcam:
```
$ git clone https://github.com/umlaeute/v4l2loopback.git
$ make && sudo make install
$ sudo depmod -a
$ sudo modprobe v4l2loopback devices=1
$ sudo modprobe v4l2loopback exclusive_caps=1 card_label="faceit_live" video_nr=1
$ v4l2-ctl -d /dev/video1 -c timeout=1000
```
Change the video_nr above in case you already have a webcam running on /dev/video1
To check if things are working, try running an mp4 to generate a video the */dev/video1* (replace ale.mp4 with your own video).
```
$ ffmpeg -re -i media/ale.mp4 -f v4l2 /dev/video1 -loop 10
```
And view it
```
$ ffplay -f v4l2 /dev/video1
```
On Ubuntu 18, I had to make a minor change to the source code of v4l2loopback.c to get loopback working. In case the above doesn't work, you can try this change before running *make* :
```
# v4l2loopback.c
from
#if LINUX_VERSION_CODE >= KERNEL_VERSION(2, 6, 29)
to
#if LINUX_VERSION_CODE >= KERNEL_VERSION(3,7,0)
```
You can also inspect your /dev/video* devices:
```
$ v4l2-ctl --list-devices
$ v4l2-ctl --list-formats -d /dev/video1
```
# Run the program
4 years ago
```
$ python faceit_live.py
```
## Parameters
--system # win or linux (default is win)
--webcam_id # the videoid of the Webcam e.g. 0 if /dev/video0 (default is 0)
--stream_id # only used in Linux. Set the /dev/video number to stream to (default is 1)
--gpu_id # for multiple GPU setups, select which GPU to use (default is 0)
4 years ago
## Example
```
$ python faceit_live.py --webcam_id 0 --stream_id 1
4 years ago
```
## Key Shortcuts when running
```
N - cycle next image in media folder
4 years ago
C - recenter webcam and create a new base image
T - option to alter between 'Relative' and 'Absolute' transformations mode
Q - to quit and close all Windows
```
# Tip
For better results, look into the webcam when starting the program or when pressing C, as this will create a base image from your face that is used for the transformation. Move away and closer to the webcam to find the ideal distance for better results.
## Troubleshooting
### Slow
If it is running slow, check that it is running on the GPU by looking at the TASK MANAGER under Windows and NVidia Control Panel for Linux.
### Multiple GPU
If you have more than one GPU, you might need to set some environment variables:
```
# specify which display to use for rendering (Linux)
$ export DISPLAY=:1
# which CUDA DEVICE to use (run nvidia-smi to discover the ID)
$ export CUDA_VISIBLE_DEVICES=0 (LINUX)
or
$ SET CUDA_VISIBLE_DEVICES=0,1 (WIN)
```